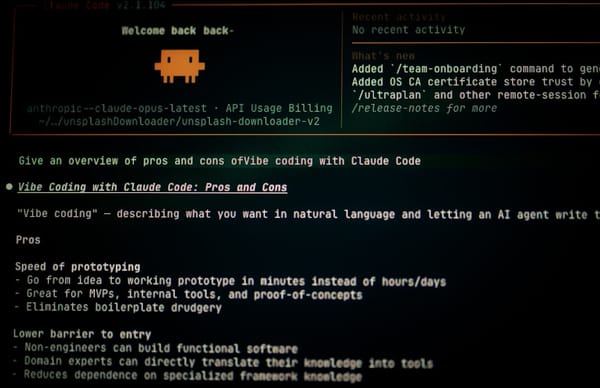
7 Myths About Color Accurate Monitors (2026) Actually Debunked
Stop wasting budget. We debunk 7 monitor myths for remote photography ops. Boost efficiency & cut manual work. See what actually works →
7 Myths About Color Accurate Monitors (2026) Actually Debunked
Managing a remote photography team presents unique operational challenges. One of the toughest is ensuring consistent, reliable color accuracy across diverse home office setups. Finding a color accurate monitor for remote work photography often feels like navigating a minefield of conflicting advice, expensive hardware recommendations, and complex calibration procedures. For operations managers, this isn't just about aesthetics; it's about minimizing rework, accelerating client approvals, and protecting your brand's reputation. Inconsistent color translates directly to wasted time, increased support tickets, and frustrated creative teams. It’s a common pain point, and honestly, much of the conventional wisdom around achieving professional color accuracy in a distributed environment is outdated or just plain wrong. Let’s cut through the noise and debunk some persistent myths that might be costing your organization time and money.
1. The Common Belief: 'You Need a Top-Tier, Dedicated Photo Monitor for Every Remote Photographer'
There's a pervasive assumption in the photography world, often amplified by marketing, that only the most expensive, specialized monitors – think flagship models from Eizo or NEC – can deliver the color accuracy truly needed for professional work. This belief often dictates procurement strategies. It leads operations leads to budget for high-end displays for every team member, regardless of their specific role. The conventional wisdom suggests that anything less than a $1500+ monitor is a compromise, driving unnecessary capital expenditure and complicating the logistics of outfitting a distributed team. "Only a true 10-bit panel with 99% Adobe RGB coverage will do," is a mantra I've heard countless times, often without a clear understanding of what those specs truly mean for day-to-day operations.

What the Evidence Actually Says: Debunking the High-End Monitor Myth
Here’s the reality check: While top-tier monitors offer exceptional performance, many mid-range professional displays can meet or even exceed the requirements for the vast majority of remote photography work. You just need to select and calibrate them properly. The key isn't just the price tag; it's understanding the specifications that *actually* matter for color accuracy and consistency. Focus on displays with these features:
- IPS or VA Panel Type: These offer superior viewing angles and color reproduction compared to TN panels.
- Factory Calibration Reports: Many reputable brands (Dell UltraSharp, BenQ SW/PD series, LG UltraFine) now ship with individual factory calibration reports. These reports indicate a Delta E < 2 out of the box, providing a solid starting point.
- Uniformity Compensation: This feature, often found in monitors around the $500-$1000 range, ensures consistent brightness and color across the entire screen. It prevents hot spots or color shifts from the center to the edges.
- Hardware Calibration Support: This is a crucial feature that separates professional-grade monitors from consumer ones. It allows for more precise and stable calibration directly at the monitor's lookup table (LUT).
>For example, a Dell UltraSharp U2723QE (around $600-700) with its IPS Black panel and factory calibration report, when paired with a good hardware calibrator, can deliver outstanding results for most editing tasks. You don't always need a $2000+ display for someone doing image culling or basic retouching. The concept of 'good enough' isn't about compromising quality; it's about optimizing resource allocation for efficiency without sacrificing the necessary accuracy for your deliverables. My own remote setup includes a BenQ SW270C (circa 2020, about $800 at the time), and with regular calibration, it consistently delivers results that clients approve without a hitch.<
2. The Common Belief: 'Hardware Calibration is Too Complex and Time-Consuming for Remote Teams'
The idea of hardware calibration often conjures images of arcane software, cryptic menus, and hours spent tweaking settings. This makes it seem impractical for a distributed workforce. Many operations managers fear that implementing a hardware calibration regimen would require specialized IT support, significant downtime for each photographer, and a steep learning curve. This perception frequently leads to skipped calibrations or a reliance on generic display profiles. That inevitably results in inconsistent color reproduction across the team and a higher incidence of visual discrepancies during review cycles.
What the Evidence Actually Says: Streamlined Calibration for Distributed Workflows
This myth is largely a relic of the past. Modern hardware calibration tools and software have become incredibly user-friendly. They're designed for efficiency and ease of use, even for non-experts. Devices like the DataColor SpyderX Pro or the X-Rite i1Display Pro Plus (now Calibrite ColorChecker Display Plus) come with intuitive software that guides users through the process step-by-step. A typical calibration session takes about 10-15 minutes once the software is installed. That's a negligible investment compared to the time saved by reducing color-related rework.
>Many calibration solutions offer automated scheduling features, reminding remote photographers when their next calibration is due. Some advanced solutions even allow for centralized profile management and deployment, making it easier for ops leads to ensure everyone is working with the same baseline. By investing a small amount of time upfront in standardized calibration, you dramatically reduce the manual fixes, endless email chains about "this looks off," and client-side color adjustments that plague uncalibrated workflows. It's a proactive measure that pays dividends in consistency and operational efficiency.<
Amazon — Check price on Amazon
3. The Common Belief: 'Software Calibration is Good Enough and Cheaper'
The appeal of software-only calibration, such as using your operating system's built-in display calibration tools (like Windows' Calibrate Display Color or macOS's Display Calibrator Assistant), is undeniable. It's free, readily available, and seems straightforward. Many remote photographers and even some operations managers believe this approach provides sufficient accuracy for professional work, particularly for distributed setups where hardware consistency is challenging. The thinking often is, "Why spend money on a calibrator when my OS can do it?"

What the Evidence Actually Says: The Limitations of Software-Only Calibration
While convenient, software-only calibration is inherently limited and simply not "good enough" for professional color-critical work. Here's why:
- Graphics Card Output Adjustment: Software calibration primarily works by creating an ICC profile that adjusts the signal *coming out* of your graphics card. It doesn't actually change the monitor's internal behavior or its native color reproduction. This is like trying to fix a leaky faucet by adjusting the water pressure at the main valve instead of fixing the faucet itself.
- Loss of Tonal Information: By manipulating the graphics card's output, software calibration often compresses the tonal range, especially in shadows and highlights. This can lead to banding, posterization, and a loss of subtle detail that is crucial for high-quality photography.
- Inconsistent Across Displays: Because it relies on visual perception and often a subjective "what looks good" approach, software calibration rarely yields consistent results across multiple monitors, even if they are the same model. Each user's perception and ambient lighting conditions will introduce variability.
- No True White Point or Gamma Adjustment: Software calibration struggles to accurately set a true white point (e.g., D65) or gamma curve (e.g., 2.2) because it lacks the ability to directly control the monitor's internal hardware.
>In essence, "cheaper" upfront often means "more expensive" in rework. The time spent manually correcting color shifts, resampling images due to banding, and dealing with client revisions stemming from inconsistent color far outweighs the cost of a hardware calibrator. I've personally seen remote teams struggle for months with color discrepancies only to resolve them within a week of implementing hardware calibration. The difference is night and day.<
4. The Common Belief: 'Brightness and Contrast Settings Don't Impact Color Accuracy'
It's a common misconception that brightness and contrast are merely 'preference' settings, akin to adjusting the volume on a speaker. Remote workers often tweak these settings for personal comfort, to match their room's ambient light, or simply because the default looks "too dim" or "too punchy." They don't understand the profound impact these adjustments have on a monitor's ability to display accurate colors. This leads to wildly inconsistent editing environments and, consequently, inconsistent outputs across a distributed team.
What the Evidence Actually Says: The Critical Role of Proper Display Settings
This myth is unequivocally false. Brightness (luminance) and contrast are fundamental to accurate color reproduction and perception. Incorrect settings can dramatically skew perceived colors and tonal relationships, leading to:
- Washed-Out or Clipped Details: Too high brightness can blow out highlights, making fine details invisible. Too low can crush shadows, obscuring important information.
- Color Shifts: The human eye perceives color differently at various brightness levels (the Helmholtz-Kohlrausch effect). A color that looks neutral at 120 cd/m² might appear slightly magenta or green at 200 cd/m².
- Inconsistent Review Cycles: If one photographer edits at 80 cd/m² and another at 180 cd/m², their images will look drastically different even on perfectly calibrated monitors. This causes endless back-and-forths during review.
For photography work, industry standards recommend a brightness target between 80-120 cd/m² (candelas per square meter). My personal preference, based on years of experience and client feedback, is around 100-110 cd/m² for general photo editing in a controlled lighting environment. Contrast should typically be left at the monitor's default (often 50% or "native") to maintain the panel's full dynamic range during calibration. These seemingly minor adjustments are critical for achieving consistency across different viewing environments and ensuring that what your remote photographers see on their screen accurately translates to print or other displays.
What Actually Works: Practical Alternatives for Ops Leads
>Moving beyond the myths, the path to optimizing your remote photography operations lies in a pragmatic, tiered approach to monitor selection and management. It's about standardization, repeatable processes, and making informed decisions that balance performance with cost-effectiveness.<
>Comparison Table: Monitor Tiers for Remote Photography Roles<
Here’s a practical breakdown of monitor tiers, helping you allocate resources wisely:
| Tier | Role Suitability | Key Features | Hardware Calibration Support | Avg. Cost Range (USD) |
|---|---|---|---|---|
| Entry-Level Pro | Image Culling, Basic Editing, Asset Management | IPS Panel, 99% sRGB, Factory Calibrated (Delta E < 3), Good Uniformity | Yes (via external calibrator) | $300 - $600 |
| Mid-Range Calibrated | Advanced Retouching, Color Grading, General Photography Editing | IPS/VA Panel, 99% Adobe RGB / DCI-P3, Factory Calibrated (Delta E < 2), Uniformity Compensation | Yes (via external calibrator, sometimes internal LUT) | $600 - $1200 |
| High-End Reference | >Final Proofing, Print Matching, Critical Color Work, Video Grading< | Advanced IPS/OLED, Wide Gamut (100% Adobe RGB/DCI-P3), Hardware LUT Calibration, Extreme Uniformity, Built-in Calibrator (optional) | Yes (internal LUT, often built-in sensor) | $1200 - $3000+ |
For most remote photography teams, the 'Mid-Range Calibrated' tier offers the best balance of performance and value. Honestly, equipping everyone with a $2500 Eizo is rarely necessary and often an inefficient use of budget. Instead, focus on providing a solid foundation with robust calibration capabilities for the majority of your team, reserving the top-tier displays for roles that genuinely demand that level of precision (e.g., lead retouchers, final print specialists).
How to Apply This: Concrete Next Steps for Your Remote Team
>Implementing a more efficient and accurate monitor strategy for your remote photography team doesn't have to be overwhelming. Here's a step-by-step guide for operations leads:<
Step 1: Audit Current Remote Monitor Landscape
Before making any changes, you need to understand what you're working with. Conduct a survey of your remote photographers' current monitor setups. Document monitor make/model, age, and any existing calibration practices (or lack thereof). This will help you identify immediate gaps and prioritize upgrades. Ask questions like: "What monitor are you currently using?", "When was it purchased?", "Do you calibrate it, and if so, with what tools?"
Step 2: Define Role-Specific Monitor Requirements
Using the tiered comparison table above, clearly define the monitor specifications required for each remote photography role within your organization. This prevents overspending on monitors for roles that don't need absolute color precision, while ensuring critical roles are adequately equipped. For example, a photographer primarily doing image culling might be fine with an 'Entry-Level Pro' monitor, while your lead retoucher definitely needs a 'Mid-Range Calibrated' or 'High-End Reference' display.
Step 3: Standardize Calibration Tools and Workflow
Select a user-friendly hardware calibrator and standardize its use across your team. Provide each remote photographer with the chosen device (e.g., a Calibrite ColorChecker Display Plus) and clear, documented instructions. Create a repeatable calibration schedule (e.g., monthly or quarterly) and enforce it. This ensures everyone is working from the same color baseline, significantly reducing color discrepancies and rework. Include screenshots and a simple checklist in your documentation.
FlexiSpot — See FlexiSpot standing desks
Step 4: Implement a Centralized Profile Management System
For larger teams, consider tools or strategies for managing ICC profiles across remote machines. While not strictly necessary for smaller teams, systems like basICColor display 5 or even shared cloud storage for standardized profiles can ensure consistency and make deployment easier. This reduces manual errors and ensures that if a monitor needs recalibration or replacement, the new profile can be quickly deployed.
Step 5: Provide Ongoing Training and Support
Don't just hand out calibrators and expect magic. Educate your remote photographers on color management best practices. Host a short webinar, create a concise FAQ, and offer accessible support for any calibration issues. A well-informed team is an efficient team. Consider a service like Eizo ColorNavigator 7 (if using Eizo monitors) which simplifies management, or even simple video tutorials on YouTube for generic calibrators. Investing in knowledge is as crucial as investing in hardware.
Amazon Associates — See latest price on Amazon
FAQ: Your Remote Monitor Questions Answered
Q1: How often should remote monitors be calibrated?
For professional photography work, I recommend calibrating monitors at least once a month. If a monitor is new, moved, or if you notice any visual inconsistencies, recalibrate immediately. Environmental changes (like new lighting) can also necessitate a fresh calibration. It's a quick process that ensures ongoing accuracy.
Q2: Can I use different monitor brands across my remote team and still achieve consistency?
Yes, absolutely! While using identical monitors can simplify things, a robust hardware calibration process is designed to bring different displays to a common standard. As long as the monitors are of decent quality (e.g., IPS panels with good uniformity) and are regularly calibrated to the same target (e.g., D65 white point, 2.2 gamma, 100 cd/m² brightness), you can achieve excellent consistency across different brands and models. The key is the calibration, not just the brand name.
Q3: What's the minimum Delta E value I should aim for in calibration?
Delta E (ΔE) is a metric that quantifies the difference between two colors. For professional photography work, aim for an average Delta E < 2. Many high-end monitors achieve Delta E < 1. Values below 2 are generally considered imperceptible to the human eye for most colors, ensuring excellent accuracy.
Q4: Is it worth investing in a monitor hood for remote photographers?
Yes, for anyone doing critical color work, a monitor hood is a worthwhile investment. It significantly reduces glare and ambient light reflections on the screen, which can drastically impact color perception. It creates a more controlled viewing environment, making consistent color judgments much easier. They're especially crucial if remote workers have less-than-ideal lighting conditions in their home offices.
Q5: How can I verify color accuracy remotely without physically seeing the monitor?
This is a common operational challenge. Strategies include: 1) Standardized Test Images: Have everyone view and comment on a specific, color-critical test image. 2) Shared Proofing Systems:> Utilize online proofing platforms that offer color-managed viewing. 3) <Calibration Reports: Request calibration reports (if the software generates them) to verify Delta E values and other metrics. 4) Video Conferencing with Screen Sharing: While not color-accurate, it can help identify gross discrepancies in a pinch, but never for final approval.
Q6: What if my remote photographers are using laptops with built-in displays?
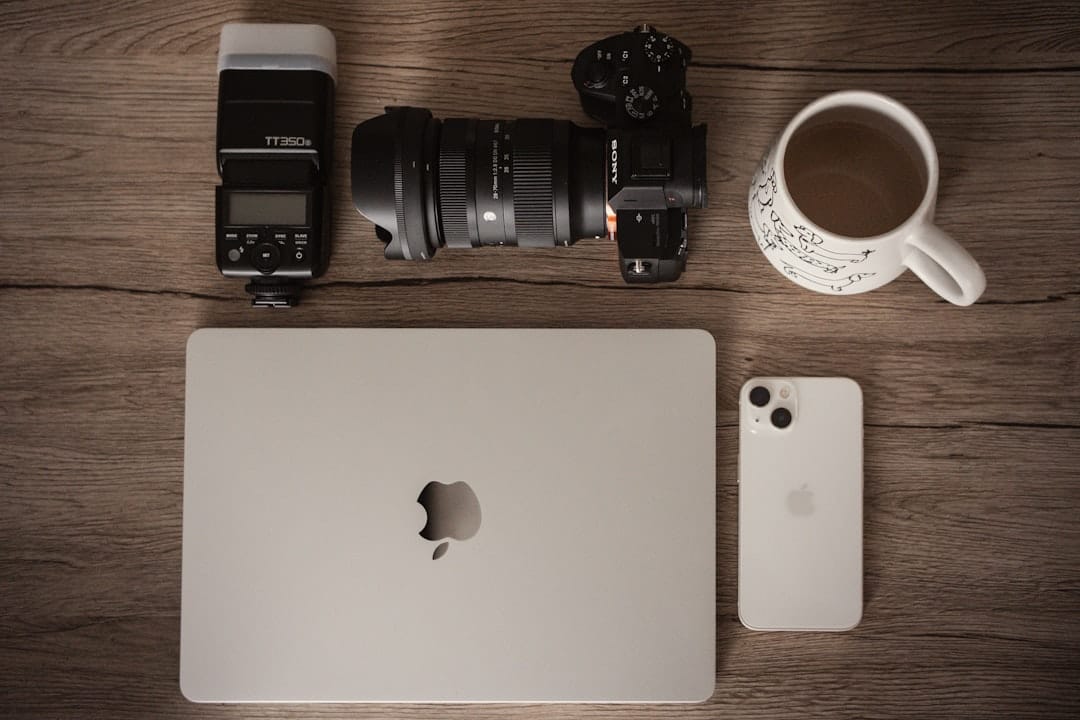
Laptop displays present the biggest challenge for color accuracy due to their typically lower quality panels, poor uniformity, and limited calibration capabilities. While some high-end laptops (e.g., MacBook Pro, Dell XPS with OLED) offer decent screens, they are still not ideal for critical work. My strong recommendation is to encourage, or even mandate, the use of an external, dedicated color accurate monitor for remote work photography for any role involving significant image editing. If an external monitor isn't feasible, ensure the laptop display is calibrated with a hardware device, but be aware of its inherent limitations.
Conclusion: Optimize Your Remote Photography Operations with Smart Color Management
The journey to achieving consistent, professional color accuracy across a remote photography team doesn't have to be fraught with complexity or exorbitant costs. By debunking common myths and focusing on what truly matters – smart monitor selection, robust hardware calibration, and standardized workflows – operations leaders can significantly improve efficiency, reduce rework, and elevate the quality of their team's output. It's about making informed decisions that use technology effectively, rather than blindly following outdated advice or marketing hype.
Re-evaluating your approach to the color accurate monitor for remote work photography isn't just an IT task; it's a strategic move that impacts client satisfaction, team morale, and your bottom line. Take these actionable insights and rethink your monitor strategy today. Your remote photographers, and your clients, will thank you.